

ADVERTISER DISCLOSURE: The Frugal Tourist is part of an affiliate sales network and receives compensation for sending traffic to partner sites, such as MileValue.com and Cardratings. This compensation may impact how and where links appear on this site. This site does not include all financial companies or all available financial offers. Terms apply to American Express benefits and offers. Enrollment may be required for select American Express benefits and offers. Visit americanexpress.com to learn more. All information about the American Express Schwab Platinum has been collected independently by The Frugal Tourist.
EDITORIAL DISCLOSURE: Opinions, reviews, analyses & recommendations are the author’s alone and have not been reviewed, endorsed, or approved by any of these entities.
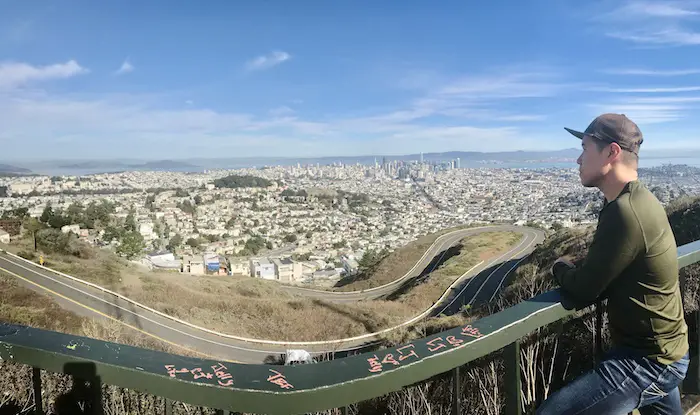
Twin Peaks, one of SF’s most iconic tourist attractions, is a must-see on your first trip to this stunning city by the bay.
After countless visits, its sweeping 360-degree views of the San Francisco Bay still never fail to blow me away.
As one of the most popular hiking trails within the city boundaries, the Twin Peaks trail concludes at the summit, which reaches an elevation of 1,898 feet (579 m) above sea level.
In addition, there are virtually no towering trees on the way to the summit.
Therefore, you will be blessed with impressive unobstructed views from all angles on your ascent.
Arguably, this San Francisco urban hike is guaranteed to give you the best views.

Urban Hike at Twin Peaks
From the top of the peaks, you can see staggering views across much of San Francisco, including the bay’s two iconic bridges: the San Francisco – Oakland Bay Bridge and the Golden Gate Bridge.
If the weather is crystal clear, you can also see San Francisco’s most famous island – Alcatraz.
Other Bay Area peaks and cities are also visible from the summit. Turn on your navigation app and try to locate Oakland, Berkeley, Mt. Diablo, Marin Headlands, and Mt. Tamalpais.
In fact, the indelible images of San Francisco’s skyline and the Golden Gate Bridge from this vantage point are beyond compare.
Time your visit around sunset on a clear day, and you’ll likely have memories that will stay with you for a lifetime.

San Francisco’s Best Views
Without a doubt, Twin Peaks is the perfect spot to savor San Francisco’s famous skyline.
Because of its lofty elevation, there are countless opportunities to snap pictures of this breathtaking urban jungle.
Wherever you turn is guaranteed to capture a picture-perfect postcard shot.
In this blog post, I will map out a walking tour itinerary that is sure to get your heart pumping to its limit.
Prepare to tackle numerous stairs along the way and summit two of SF’s most famous hills.
If you fancy a leisurely stroll, you can adjust your walking speed and pause periodically to admire the views of San Francisco’s skyline.
When to Hike Twin Peaks?
Even though this tour is highly recommended, I do not suggest embarking on this urban hike if the city is enveloped by fog.
Not only will the views be hidden, but they will also be uncomfortably cold, damp, and windy.
Since SF weather is challenging to predict, if you find yourself up on the peaks on a foggy day, waiting for half an hour or so may prove rewarding as the fog sometimes clears up.
Nevertheless, make sure you have ample layers in case the weather sours unexpectedly.
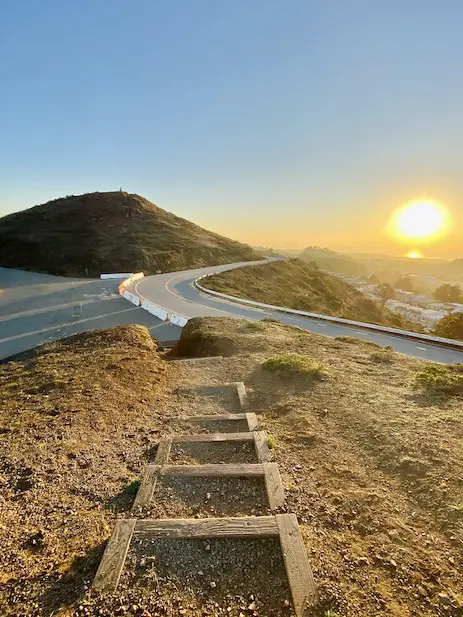
The perfect time of day to hike these hills is an hour or two before sunset, so you’re certain to be on the summits while the sun is just about to “call it a day.”
It is truly mesmerizing!
If you are an early riser, Twin Peaks is also a terrific spot to witness the sun rising on the horizon.
But a visit at any time, as long as there is not a lot of fog, is guaranteed to be unforgettable.
Alternatively, you can ride your bike, scooter, or skateboard to the peaks.
The trail is accessible to everyone and open to pedestrians every day of the year.
Lastly, it is also possible to drive all the way up to the peaks if you prefer not to hike or if you have mobility issues.
If you’re visiting, this is a bucket-list San Francisco attraction that even locals frequent occasionally.
Do not miss it!
Twin Peaks Opening Hours & Restroom Information
Twin Peaks is open every day, including holidays.
The parking lot opens at 5 AM and closes at 12 midnight.
Restrooms are available near the main parking lot on Christmas Tree Overlook.
Is Twin Peaks the Highest Mountain In San Francisco?
Although frequently mistaken as the highest spot in SF, Twin Peaks’ 922-foot summit is second only to Mt. Davidson in altitude.
But, without a doubt, these peaks certainly beat Mt. Davidson and all of San Francisco’s other 40-plus hills as far as sweeping splendid vistas.
What to Bring And What To Wear?
- Water
- Sun Protection
- Camera
- Navigation
- Binoculars (bring quarters to activate the binoculars on site)
- Snack
- Sturdy Shoes
- Layers of Clothing since the weather is unpredictable at the top
- Rain Jacket
- Umbrella during winter
Visit Twin Peaks At Night
Another recommended alternative to hiking the summit of Twin Peaks is to drive up to the hills just before dusk.
Not only will you witness the sun disappearing behind the Pacific Ocean, you will also get to watch the exact moment when the lights of downtown San Francisco start to shine.
Parking
Space is extremely limited to no more than 40 spots. This is an incredibly popular tourist attraction, so expect to wait about 15-30 minutes if the parking lot is full.
Type “Twin Peaks Parking Lot” on your navigation app, and it will direct you to the Christmas Tree Overlook Parking Lot.
There are also parking spots at Crestline and Vista Lane, where the Twin Peaks trailhead begins.
This is a good alternative if you do not like to wait for a parking spot to become available.
Free Downloadable Map of the Twin Peaks Urban Hike
Click the square icon to automatically download the map below on your smartphone before or during this urban hike.
You may also save it for later or share it with someone who may benefit from this hike.
The hike and the corresponding map have two segments:
a. Noe Valley to Twin Peaks Trailhead (Points A to F)
b. Twin Peaks (Points A to D)
Part 1: Noe Valley To Twin Peaks
A. Start at Noe Valley Courts
We are starting this walk in one of SF’s highly desirable neighborhoods – Noe Valley.
It is currently one of the most expensive places to live in the city, with median house prices approaching 2 million dollars.
As per Wikipedia, Noe Valley’s famous residents include sculptor Ruth Asawa and Facebook CEO Mark Zuckerburg.
Carlos Santana and Benjamin Bratt both graduated from James Lick Middle School on Noe Street.
Our tour starts just a block from Noe Valley’s downtown area – at Noe Valley Courts – at the corner of Elizabeth and Douglass Streets.
This park has a playground and lots of greenery for dogs and families to gather.
A block south is Noe Valley’s downtown – 24th Street.
You can grab a bite at any of the restaurants here or buy an SF original- Philz Coffee’s Mint Mojito, either before or after the hike.
When you’re ready, walk slightly uphill along Elizabeth Street towards our destination – the Twin Peaks – which should be visible from here.
The next block up is Elizabeth Street and Hoffman Street – the location of our first stairway.
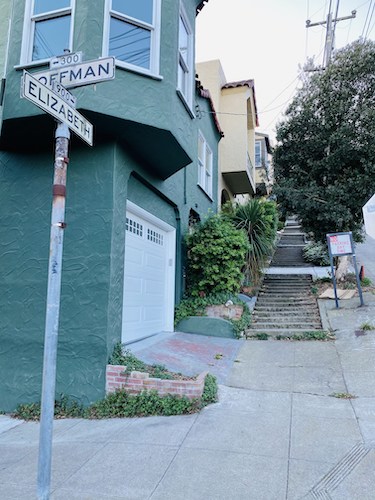
B. Elizabeth Street and Hoffman Street
Your first lung-busting set of stairs greets you at this corner.
Depending on your fitness level, you can use this as your warm-up climb, or you can take your time checking out the different architectural details of the houses along this street.
At the top of the stairway is Grand View Avenue.
C. Elizabeth Street and Grand View Avenue
The major throughway before you is Market Street.
We will need to cross this busy roadway by crossing over an elevated pedestrian walkway, which should be visible on your right.
You can safely cross the street to the other side of Elizabeth Street and walk along Grand View Avenue until you reach the passageway.
Safely cross the street and ascend the walkway’s spiral entrance.
Cross Market Street via this path, but remember to look back.
The views of SF’s Financial District are spectacular from this vantage point.
At the end of the walkway is a ramp that will deliver you to the 900 block of Corbett Avenue.
Turn right until you reach the next corner – Corbett and Hopkins.
D. Hopkins and Corbett
Once at this intersection, look up!
The Sutro TV Tower should be visible from this corner- that is the direction in which we are headed. It’s hard to miss!
Rising above 977 feet, this three-pronged TV & radio antenna tower is a permanent fixture in SF’s skyline. Residents use Sutro Tower as a beacon to orient them to where Twin Peaks is – particularly valuable when the summits are shrouded with fog. Even though not actually erected on Twin Peaks, it’s close enough to assist with navigation. Previously the tallest edifice in SF, Sutro Tower was recently replaced by Salesforce Tower, which was the highest structure in the city in 2017. (Wikipedia)
There are no stairs on this semi-steep street, so it may be a bit challenging to the knees. Take your time.
Burnett Avenue is at the top of Hopkins Avenue.
You will notice a set of stairs just right across from where you are. Ignore that one for now.
Instead, make a left turn and walk until you find your next set of stairs – Vista Lane – across the street.
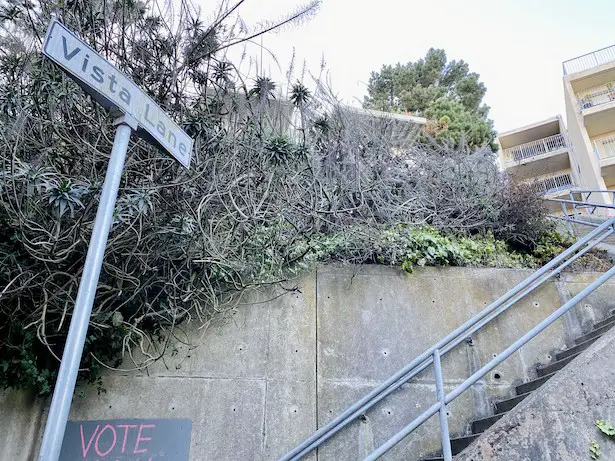
E. Vista Lane Steps
Ascend Vista Lane for about three heart-pounding blocks, crossing both Gardenside Drive and Parkridge Drive.
You can make this section as intense or as mellow as you like.
Nonetheless, it has a lot of steps—hundreds of them!
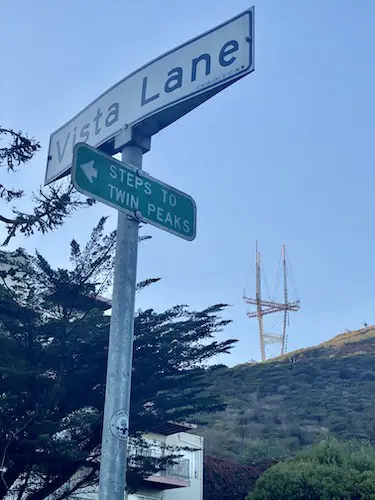
At the top of the steps on Parkridge Drive, you will have a clearer view of Twin Peaks & the Sutro TV Tower to your right.
Avoid the temptation to walk in that direction. Instead, Vista Lane continues to your left.
Don’t worry. There will be signs to direct you in the right direction.
In fact, look for the arrow directing you to “Steps to Twin Peaks.”
Continue revving up your heart rate by conquering the final leg of Vista Lane, which will terminate on Crestline Drive.
F. Crestline Drive and Vista Lane
The trailhead to Twin Peaks is Opposite Crestline Drive and Vista Lane.
Congratulations—you are over halfway done!
Part 2: Twin Peaks
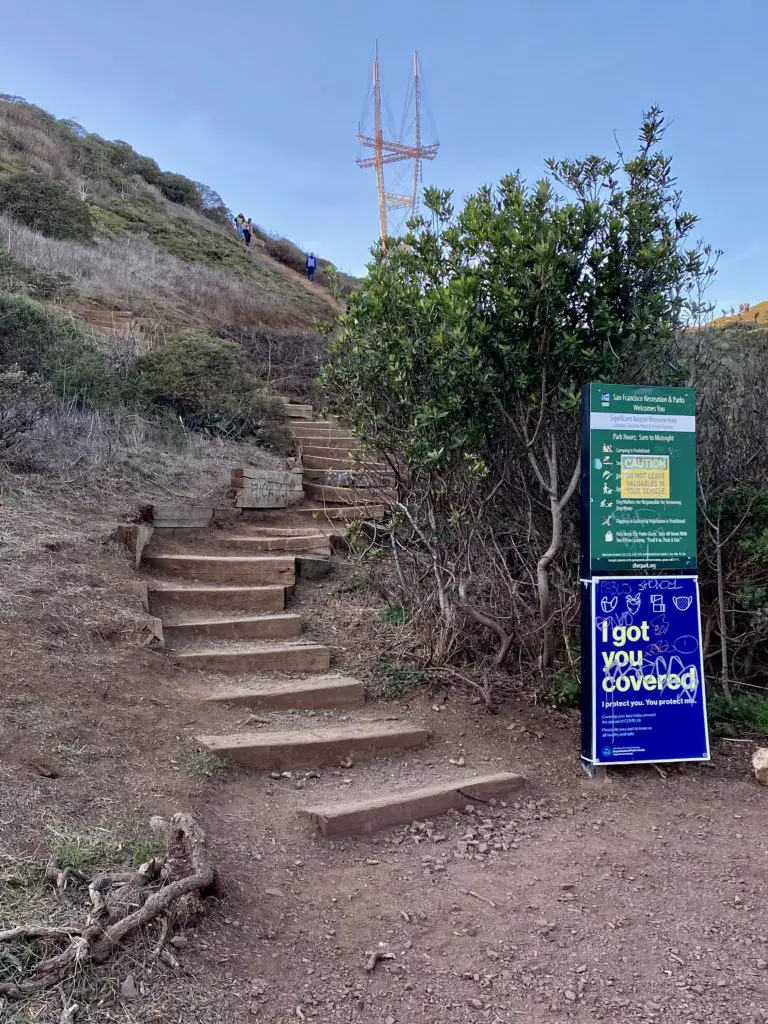
A. Twin Peaks Trailhead (Opposite Crestline & Vista Lane)
This next section will be a bit easier than the previous one.
We will be scaling the peaks on well-marked pathways with mostly wooden steps.
Erosion is a constant threat up in these hills because of overuse, so please follow the provided steps and do not veer off the paths.
Start walking up the wooden steps until you reach Twin Peaks Boulevard.
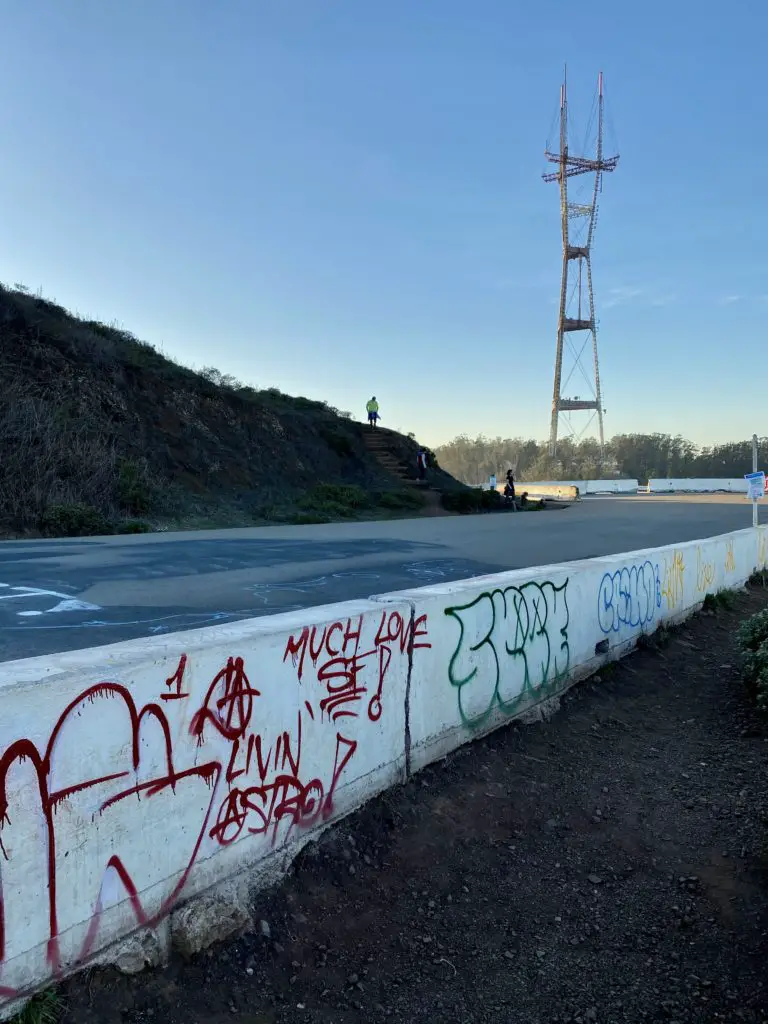
This road used to be incredibly busy with tour buses and human traffic, but thanks to COVID, you will only come across a few skateboarders, cyclists, and hikers like you.
Also, Twin Peaks Boulevard has a waist-high, graffiti-covered barricade that you have to breach.
Be careful when you hop over this hurdle.
Noe Peak is the hill directly before you.
Eureka Peak, its twin brother, is the hill to your right.
We will climb up Noe Peak first.
B. Noe Peak (Southern Hill)
Once you have successfully negotiated the barrier on Twin Peaks Boulevard, cross the street and bear to your right to find the stairs leading up to Noe Peak.
Gently climb the trail, as the wooden steps are somewhat uneven.
Pause and look back frequently to savor the views of SF and Eureka Peak on the same frame.
If you trek up here around sunset, the views of the sun disappearing behind the Pacific Ocean are nothing short of spectacular.
Even after seeing this phenomenal event multiple times in the past, it still never fails to captivate me.
Take a few snaps of Eureka Peak and SF from this vantage point.
Admittedly, Eureka Peak is the more photogenic of the two peaks.
Watch your step as you navigate back down to the trailhead where you came from along Twin Peaks Boulevard.
The trailhead for the steps leading up to Eureka Peak should be visible from here.
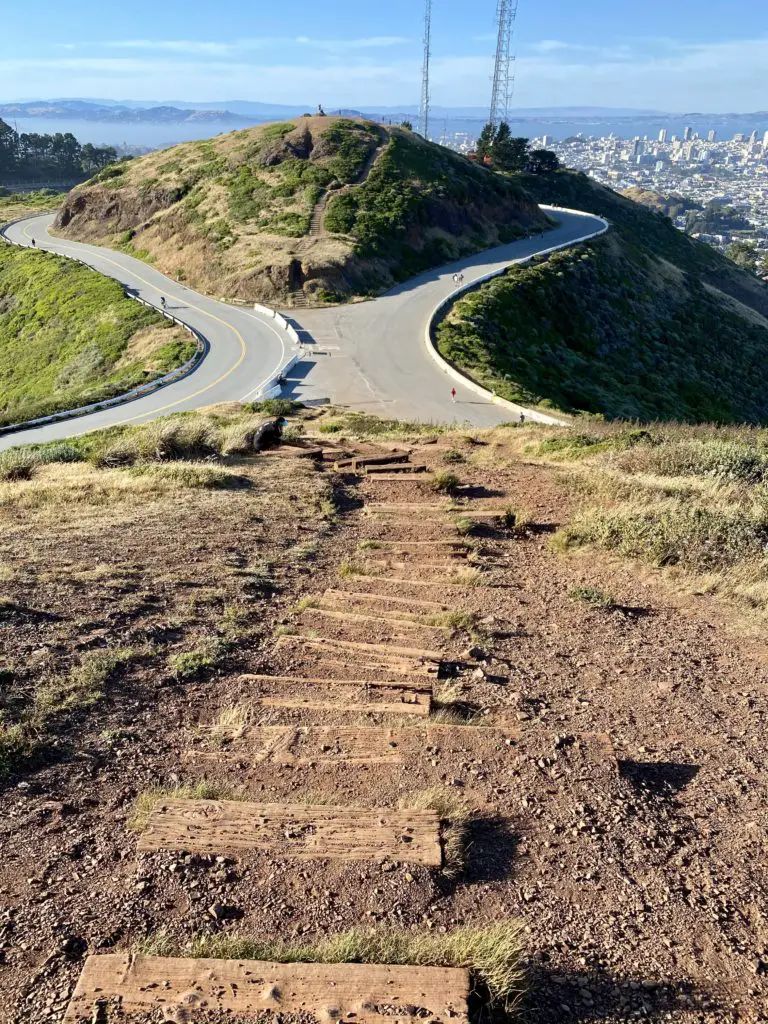
C. Eureka Peak (Northern Hill)
To the north of Noe Peak is Eureka Peak.
Eureka Peak is slightly larger than Noe Peak and indisputably the more popular one.
Its peak provides sweeping unobstructed views of the SF skyline as well as the Golden Gate Bridge.
Once at the top, pause here for a moment and relish your achievement. You’ve successfully climbed up the Twin Peaks.
Descend the opposite series of stairs so you arrive on the other side of Eureka Peak.
From here, follow the signs to Christmas Tree Point Overlook.
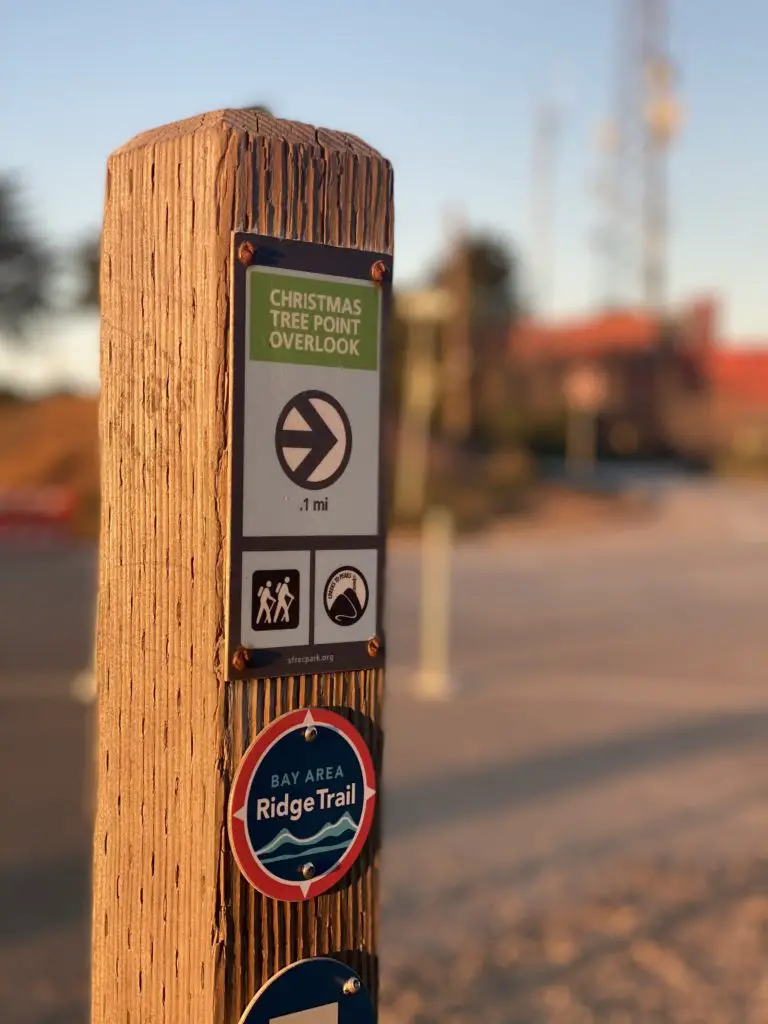
D. Christmas Tree Point Overlook
Previously a frenetic tourist attraction, this lookout is surprisingly serene without the cars and tour buses.
Pre-Covid times, the parking lot is constantly jampacked with all types of vehicles – cars, vans, and massive tour buses.
Now, you will only see a handful of hikers and tourists – those who exerted the effort to trek up here.
Without the fog, the views here are simply astonishing. Make sure to capture the views from all angles.
Walk along the brick barrier to the other side for views of the Golden Gate Bridge.
End of the Walking Tour
Congratulations! We had reached the end of our urban hike. You have a few options from here.
Option 1: You can go back down Vista Lane and retrace the steps back to where you parked. Once you get back to Noe Valley, feel free to grab a sip of Philz Coffee’s famous Mint Mojito just opposite the park where we started. A handful of restaurants are also within walking distance.
Option 2: If you still have the energy to embark on another urban hike, I have a few other recommendations for you here.
Option 3: An alternative way to go back down is via Twin Peaks Boulevard towards Burnett (follow the signs pointing towards Stanyan). The map below will chart out the itinerary if you want to make this hike a loop. Click the star icon to automatically download the map on your smartphone.
Alternative Path Back to Where We Started
A. From Christmas Tree Point, walk along Twin Peaks Boulevard towards Stanyan. Follow the road until you hit Burnett Avenue. Views of the SF skyline are glorious here.
B. The first street you will come across is Burnett Avenue. Turn right until you get to 275 Burnett Avenue.
C. 275 Burnett Avenue will have unobstructed views of the SF skyline. Take a few snaps here. Follow Burnett Avenue until Hopkins. Follow Hopkins back to Corbett all the way down to the Market Street overpass.
D. Once you’re at Market Street level, walk along the side pathway towards your next set of stairs – Dixie Stairway. Descend these stairs and walk down Alvarado Street. Refer to the map provided.
E. Take an architectural stroll along Alvarado Street, which showcases different quintessential SF home designs, from Georgian and Victorian to the more modern style. Marvel at the stunning facades of the houses here. Walk until you hit Alvarado Elementary School.
F. Make a right on Douglass and walk down until you hit the Noe Courts, the beginning of our hike.
How to Get to Twin Peaks Via Public Transport
At the Noe Valley Trailhead:
Buses 24 and 48 have stops in Noe Valley near our trailhead.
At the Twin Peaks Trailhead on Crest View Lane:
Buses 48, L, and 37 can get you to the Twin Peaks Trailhead.
At the Twin Peaks Parking Lot:
Buses 48, L, and 37 can also get you to the Twin Peaks Parking Lot.
Before Your Trip to San Francisco
Where to Stay
San Francisco is expensive, even for locals.
For tourists, I suggest using credit card points and free night awards to save some cash.
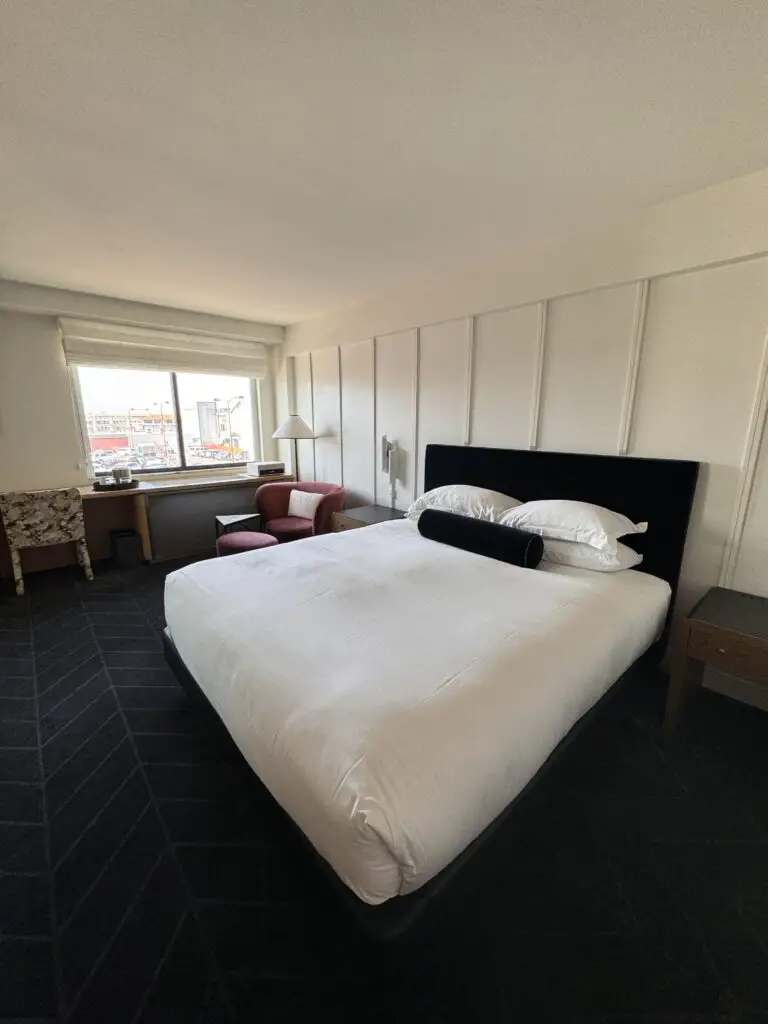
I got this free stay at the Kimpton Alton in San Francisco’s Fisherman’s Wharf area from my IHG One Rewards Premier Business Credit Card.
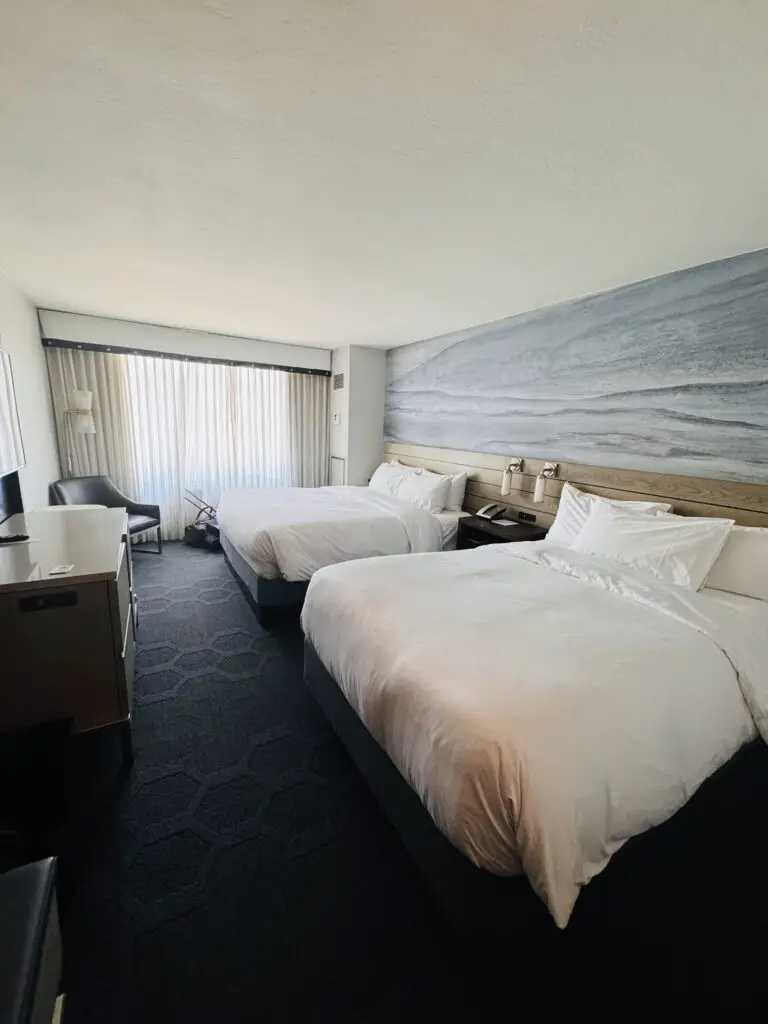
I also recommend the Hyatt Centric Fisherman’s Wharf Hotel, which is located a minute away from the Kimpton.
I stayed here for free using the World of Hyatt points I earned from my Chase Sapphire Preferred® Card and World of Hyatt Business Credit Card.
Travel Insurance
How to FLY to San Francisco for almost FREE
All of my trips over the past decade had been ALMOST FREE via travel miles and points.
I accumulate these points from credit card rewards and bonuses.
Some of these credit cards are featured here.
If you are new to traveling using miles and points, join us in our Free Travel Miles and Points Facebook Group.

Final Thoughts
San Francisco, famously known as one of the most picturesque cities in the United States, boasts a unique charm that enchants visitors from all corners of the globe.
Embarking on a hike to Twin Peaks is an incredible adventure, and it is highly recommended if you have an extra half-day in the city.
You’ll see breathtaking views of the city skyline, the iconic Golden Gate Bridge stretching across, and the bay shimmering under the setting sun’s colors. It’s a mesmerizing sight!
Without a doubt, hiking to Twin Peaks offers an amazing adventure that will surely create memories to last a lifetime.
ADVERTISER DISCLOSURE: The Frugal Tourist is part of an affiliate sales network and receives compensation for sending traffic to partner sites, such as MileValue.com and Cardratings. This compensation may impact how and where links appear on this site. This site does not include all financial companies or all available financial offers. Terms apply to American Express benefits and offers. Enrollment may be required for select American Express benefits and offers. Visit americanexpress.com to learn more. All information about the American Express Schwab Platinum has been collected independently by The Frugal Tourist.
EDITORIAL DISCLOSURE: Opinions, reviews, analyses & recommendations are the author’s alone and have not been reviewed, endorsed, or approved by any of these entities.
USER-GENERATED CONTENT DISCLOSURE: The comments section below is not provided or commissioned by the bank advertiser. Responses have not been reviewed, approved, or otherwise endorsed by the bank advertiser. It is not the bank advertiser’s responsibility to ensure all questions are answered.

What a spectacular view! I hope to take my teen boys to San Francisco some day. This would be a great way to see the city from a different perspective.
Hmm great ideas here! I wonder how San Francisco is doing now during the new COVID-19 spike. Thanks for sharing some resources to get outside and be able to stay sane while also staying safe!
I visited San Fran in the past and wasn’t impressed. I wish I would have known about this hike as it definitely seems more my style. Thanks for the info!
Hi Megan, Thank you for stopping by. I think the entire family will love SF! So much to do and see, and experience! Feel free to reach out anytime for more tips!
HI Dana, SF has thankfully kept the trails and paths opened during COVID19 so there is still so much nature and view to explore and enjoy!
HI A Couple Days Travel, SF has magical stairways hikes all over! Hope you give it a second chance!